Import Previous Year's Pages
- 18 Jul 2023
- 1 Minute to read
- Print
- DarkLight
- PDF
Import Previous Year's Pages
- Updated on 18 Jul 2023
- 1 Minute to read
- Print
- DarkLight
- PDF
Article summary
Did you find this summary helpful?
Thank you for your feedback!
We recommend this step shortly after you have completed the yearbook project to ensure you capture all the templates you wish to use in your next project.
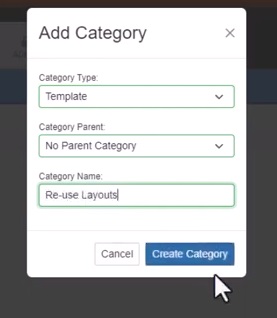
From BUILD-IT > Library, create a template folder.
Select Add Category > select Template for the Category Type > leave Category Parent as No Parent Category > give your category a name.
Then select Create Category.
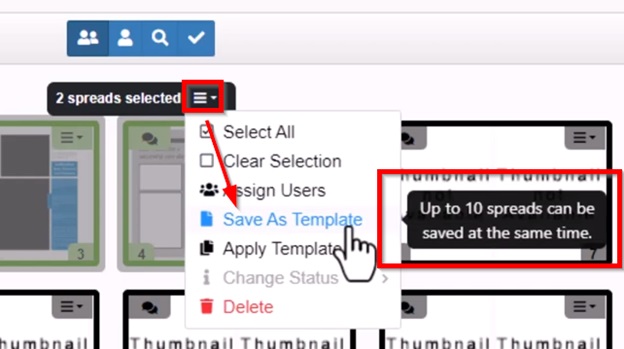
Go to Pages and select the desired page spreads - up to 10 spreads at a time - and then click the menu icon  and select **Save As Template. **
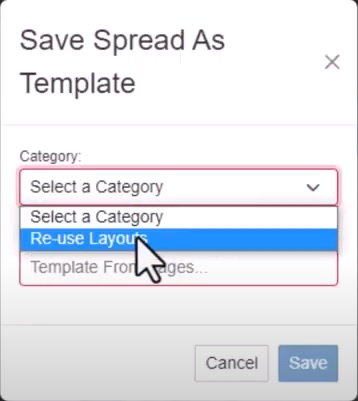
Select the category you created earlier.
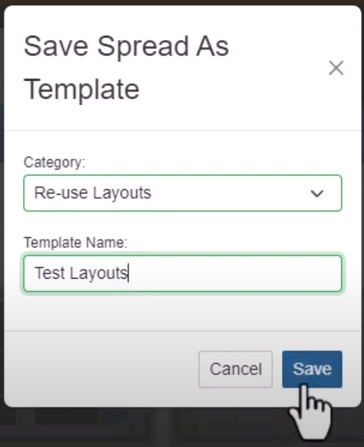
Name your template(s) and then click **Save. **
You can now import these templates into your next project.
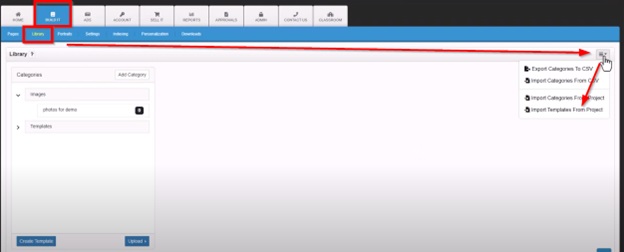
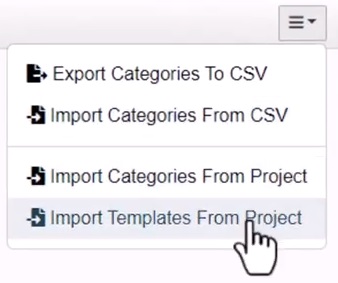
To do this, go to your next project, then go to your Library, click the menu icon  on the right and select Import Templates from Project.
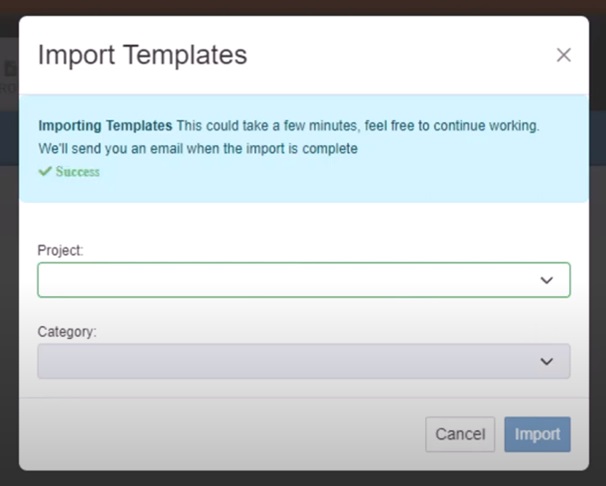
Select the previous project, then select the category you created in the previous project.
Click **Import. **
After clicking Import, a message will pop up to inform you that you can leave the screen - click Cancel - and it will continue to import the folder in the background.
You will also receive an email notification.
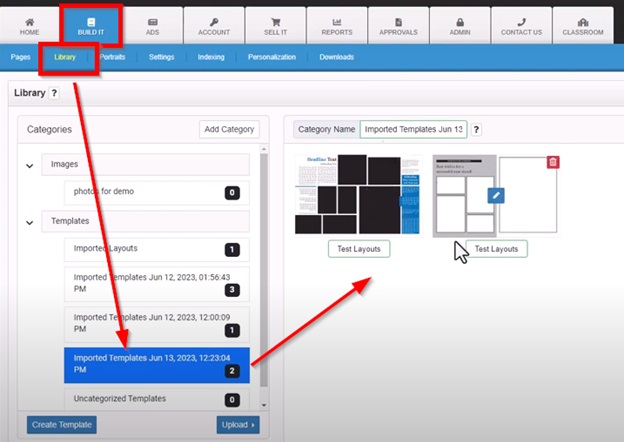
Refresh the page to see the imported folder.
Please refer to the help video at the beginning of this article for visual tutorial.
Was this article helpful?