InDesign & Photoshop Covers & Endsheets
- 08 Apr 2022
- 4 Minutes to read
- Print
- DarkLight
- PDF
InDesign & Photoshop Covers & Endsheets
- Updated on 08 Apr 2022
- 4 Minutes to read
- Print
- DarkLight
- PDF
Article summary
Did you find this summary helpful?
Thank you for your feedback!
Submitting InDesign & Photoshop covers
Before you submit any cover files you need to make sure that the different parts of the cover are in the correct locations. Below is a diagram showing the different parts of the cover and what they are for.
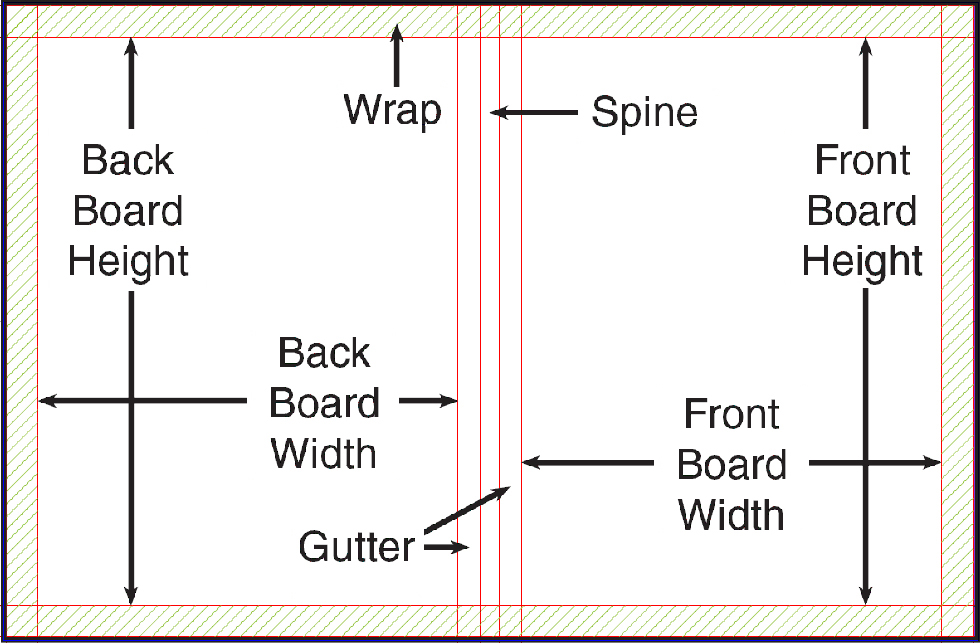
Wrap: This is the area on the edge of the cover that is wrapped around the cover board and glued. Most of the content in this area will be covered but if you have any background elements that you want to run off the edge of the cover then make sure it covers this wrap area.
Gutter: This is the area of the cover beside the spine that is indented and is used as the hinge of the front and back cover. It is recommended that no important content be placed in this area as it may be distorted or hard to see.
Spine: This is the area of your cover that has your spine text. Typically the spine text would read from top to bottom and usually contains the school name, year or publication version.
InDesign Covers
When supplying covers created in InDesign, you will need to make sure to supply the InDesign file, images, and fonts. To do that you will need to use the package feature to gather these files in to one folder. Below are the steps to package the InDesign file.
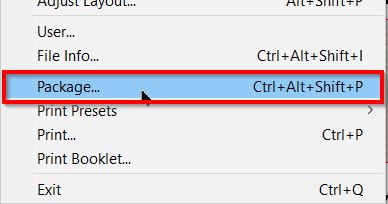
1. Open the layout/file in InDesign. Then go to File>Package.
2. In the Package summary click on Links and Images header on the left hand side.
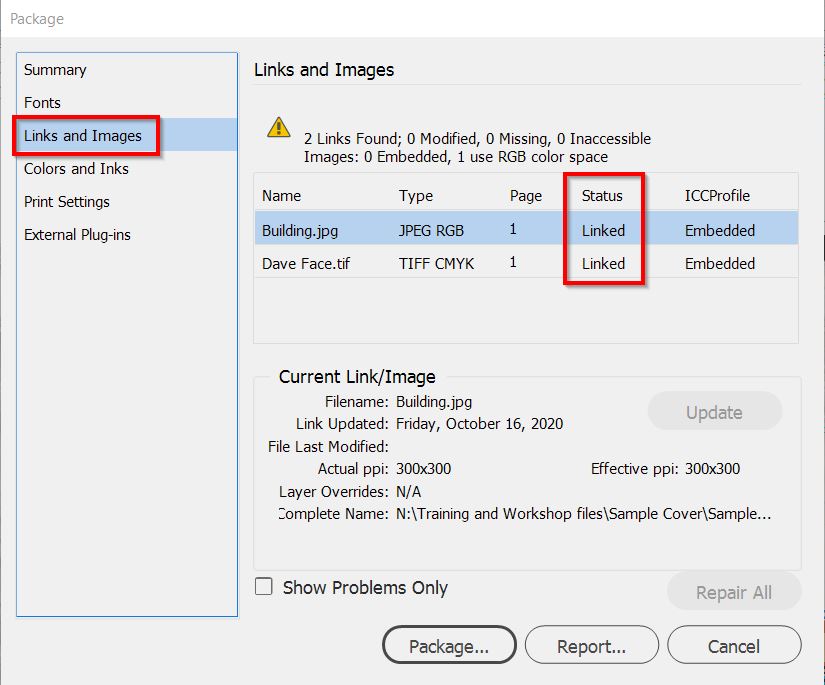
3. Make sure that under status all the images indicate Linked. If it indicates missing then InDesign cannot find the original image that was placed. You will need to close this window and find that image so that it can be re-linked to the file. If it indicates Embedded then the image has been copied and pasted into the layout and should be re-linked to the original image before packaging.
4. If all the images are linked then click on Package. (You may see a Printing Instructions window will come up at this point. Just click Continue to this window).
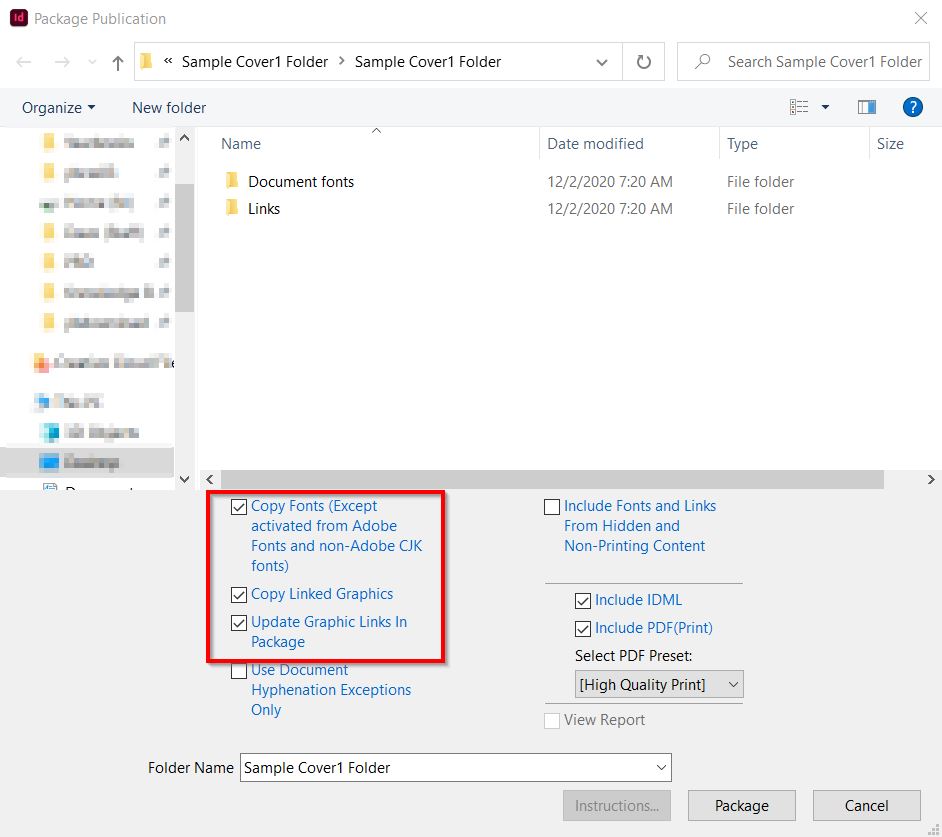
6. From there a browse window will come asking where to place the package files when complete. In this window make sure that the Copy Fonts, Copy Linked Graphics and Update Graphic Links in Package check boxes are turned on. Then click on Package.
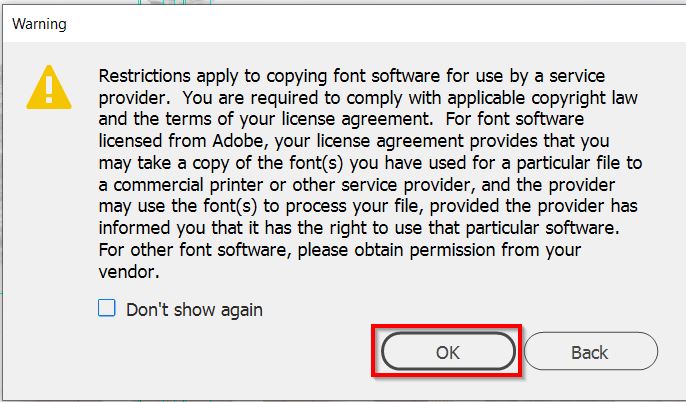
7. At this point a font disclaimer window will come up. This is a disclaimer basically indicating that you are responsible for the fonts you are using and that you have permission to use them. Once you have read the disclaimer, click ok.
8. InDesign will then begin to package the files to the location you indicated. After it has completed open the folder that contains the package.
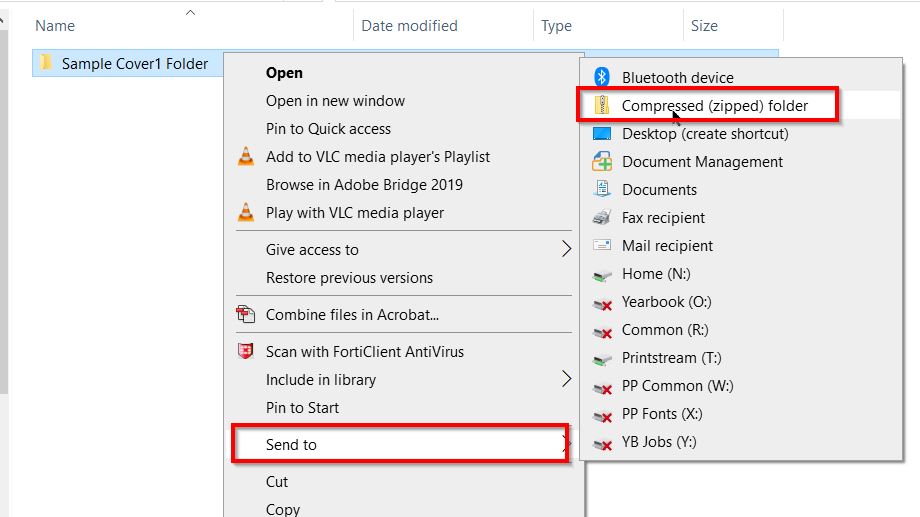
9. In order to submit this packaged folder to Friesens it needs to be compressed into a zip file. To do this Right-Click and select Send To > Compressed (Zipped) folder. On a Mac use Option-click and select Compress or Create Archive.
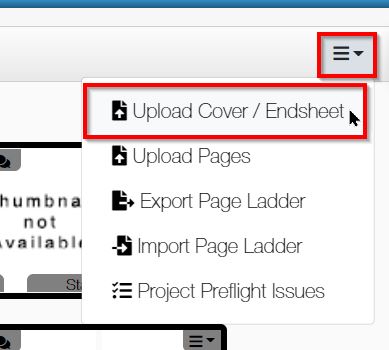
10. Once this is done you will have a zipped copy of this folder that can be sent to Friesens. To upload, login to ConnectMe and go to the BuildIt tab. In that BuildIt tab there is a drop down menu on the far right side of the screen. In this drop down menu there is an option to Upload Cover / Endsheet.
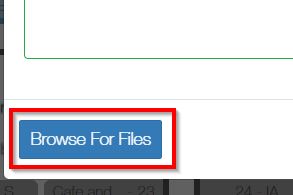
11. In the upload window click on Browse and select the zip file that you just created of the packaged InDesign folder.
12. Once you have selected the zip file add any comments\instructions that you need to relay to our production department. After entering the comments click on upload in the bottom right corner of the upload window.
Below is a video showing how to submit InDesign covers (Packaging and Uploading)
Photoshop Covers
When submitting Photoshop cover files you want to make sure that the file remains in layered format and saved as a .psd file. Submitting the files with layers allows our staff to process these files and make adjustments if necessary. Also, if you are requesting any special effects (foil, embossing, spot gloss, etc...) the layered files will help our staff process those special effects.
1. When you have the Photoshop file open check the layers panel. If you don't see the layers panel on the right hand side of the screen you can go to the Window menu and click on Layers.
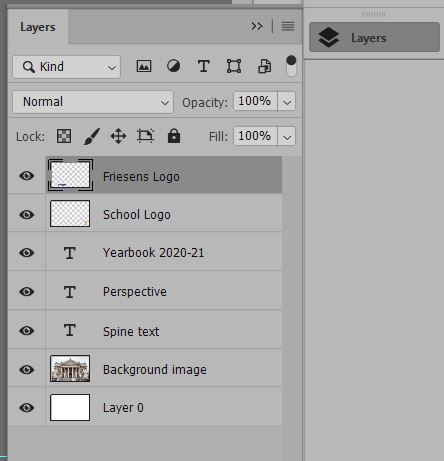
In this window make sure the layers are separated.
2. You also want to make sure that the size and dpi of the Photoshop file is correct. Friesens recommends that any image files including covers are submitted at 300dpi at full size. To find out what size and DPI the file is go to Image>Image Size. If you are not sure what the dimensions of the cover should be you can contact your project specialist in the plant and they can provide you with a template at the correct size for your book.
.jpg)
3. Once you have confirmed the components of the cover and the dpi you need to save the file as a .psd file. To do that go to File>Save As. Make sure the Save as type drop down indicates .psd. Also, make sure that the layers checkbox is turned on.

4. To upload, login to ConnectMe and go to the BuildIt tab. In that BuildIt tab there is a drop down menu on the far right side of the screen. In this drop down menu there is an option to Upload Cover / Endsheet.
5. In the upload window click on Browse and select the .psd file that you just saved from Photoshop.
6. Once you have selected the .psd file add any comments\instructions that you need to relay to our production department. After entering the comments click on upload in the bottom right corner of the upload window.
Below is a video showing how to upload a cover created in Photoshop
Was this article helpful?