Orders
- 31 Mar 2023
- 3 Minutes to read
- Print
- DarkLight
- PDF
Orders
- Updated on 31 Mar 2023
- 3 Minutes to read
- Print
- DarkLight
- PDF
Article summary
Did you find this summary helpful?
Thank you for your feedback!
The Orders tab contains all the order transactions that have gone through the store. By default, only Paid orders will appear. But users can browse through the 'Standard Searches' to view other order status types.
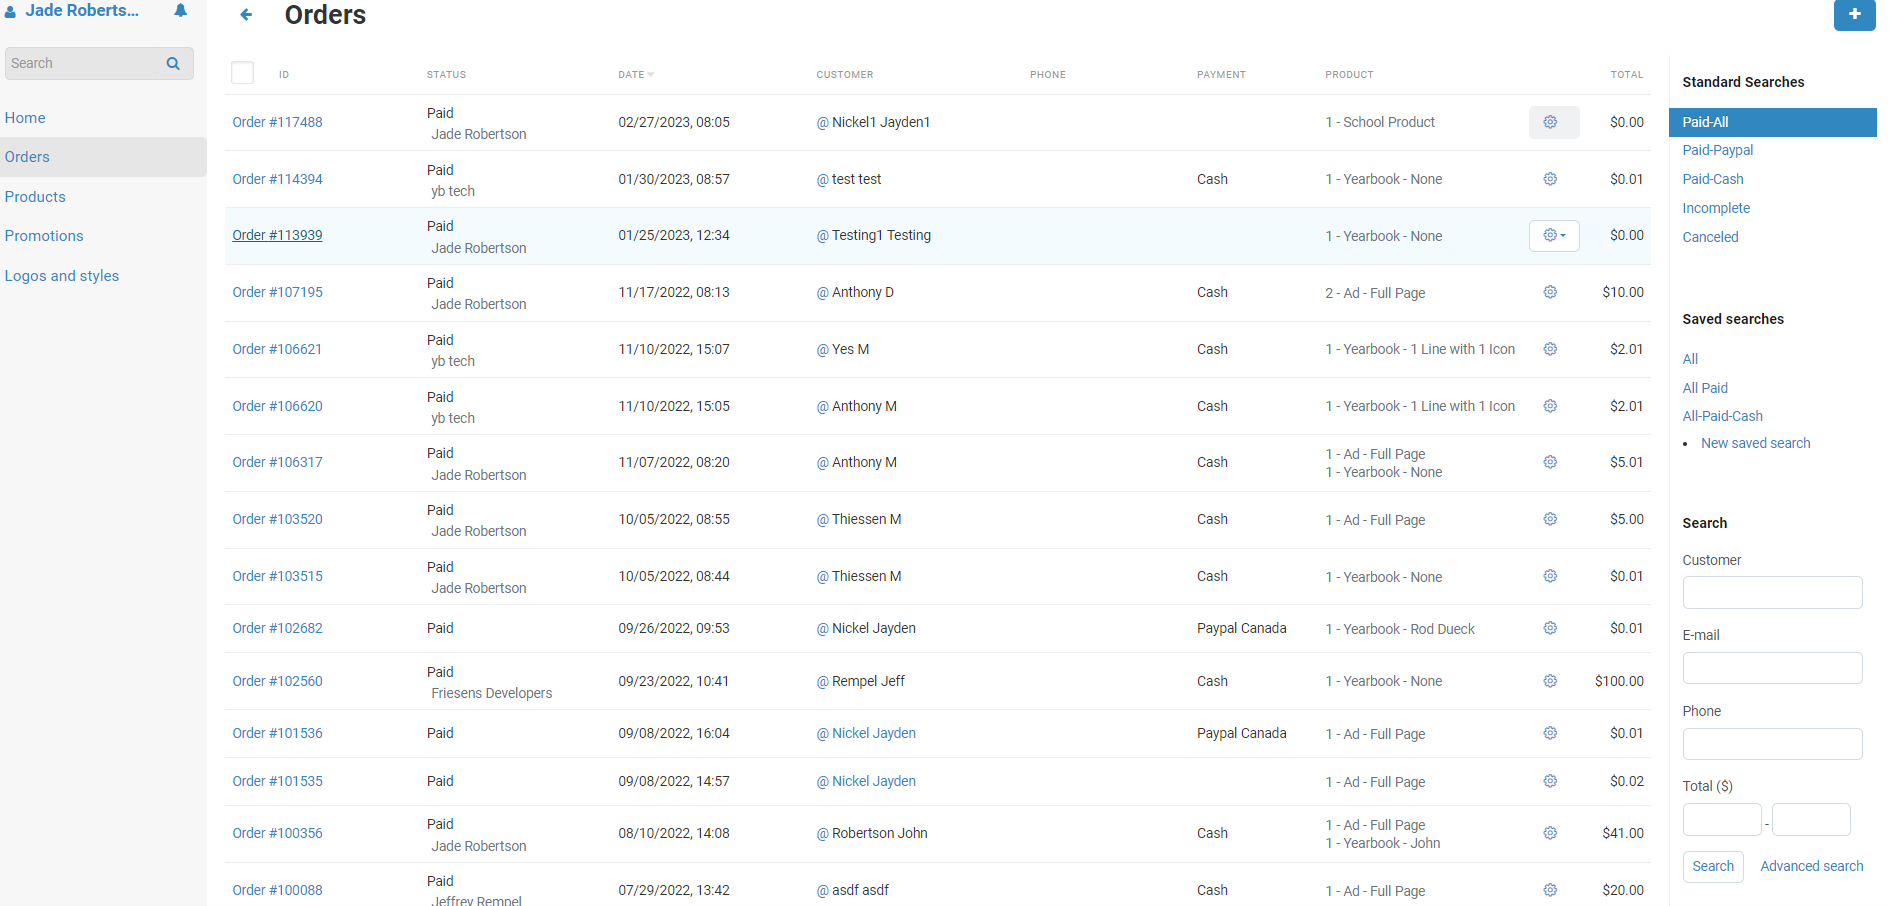
Clicking the @ sign next to the customer’s name allows you to email the customer.
Clicking the gear icon next to payment type and then ‘View’ allows you to review a specific order.
When there are more orders, you can use the search function to search for a particular customer or use Advanced search to narrow down your search parameters even further.
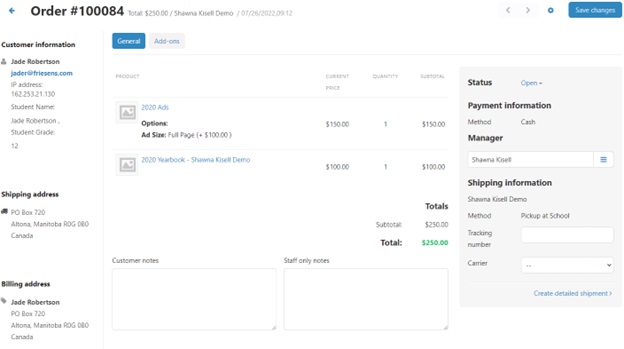
Reviewing an order
Click on the order number and you will see the purchase information including products, shipping, payment, and customer information.
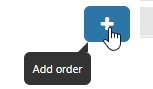
Creating an offline order
Click the + symbol in the top right of the Orders page to add an order.
Add a product(s) by clicking in the search bar which will reveal the available products.
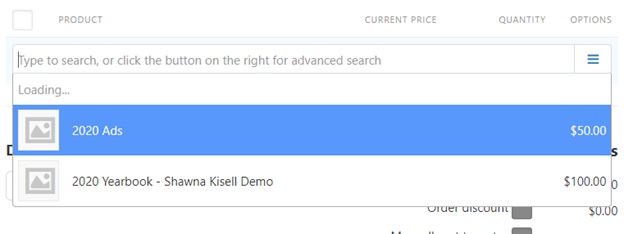
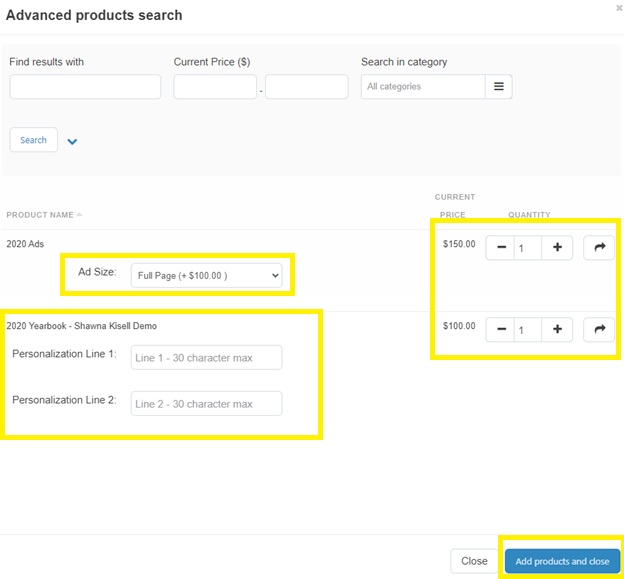
NOTE: if you have a product with different options, such as an Ad, then you will need to click on the list icon and select the appropriate option.

Or click on the hamburger menu (3 horizontal lines) to do an advanced search. You can select the desired options for products that have that available i.e., Ads, select quantity and add personalization information (if applicable). Then select Add products and close.
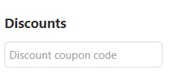
You can apply coupon codes in this section (if available) to honor any discounts you’ve promised your customers.
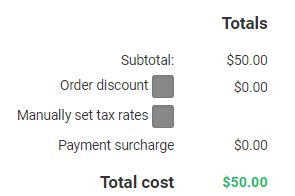
The Order discount and Manually set tax rates checkboxes are greyed out.
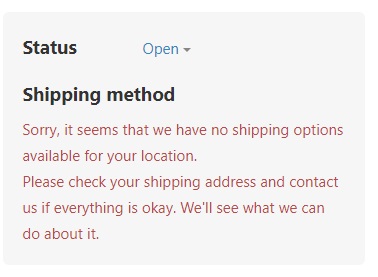
You will not be able to enter an order with no shipping information. A message will be shown letting you know that this information needs to be entered.
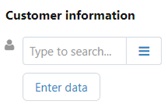
Enter the customer information by selecting Enter data.
Enter in their contact information. Fortunately, only the red asterisk fields are mandatory.
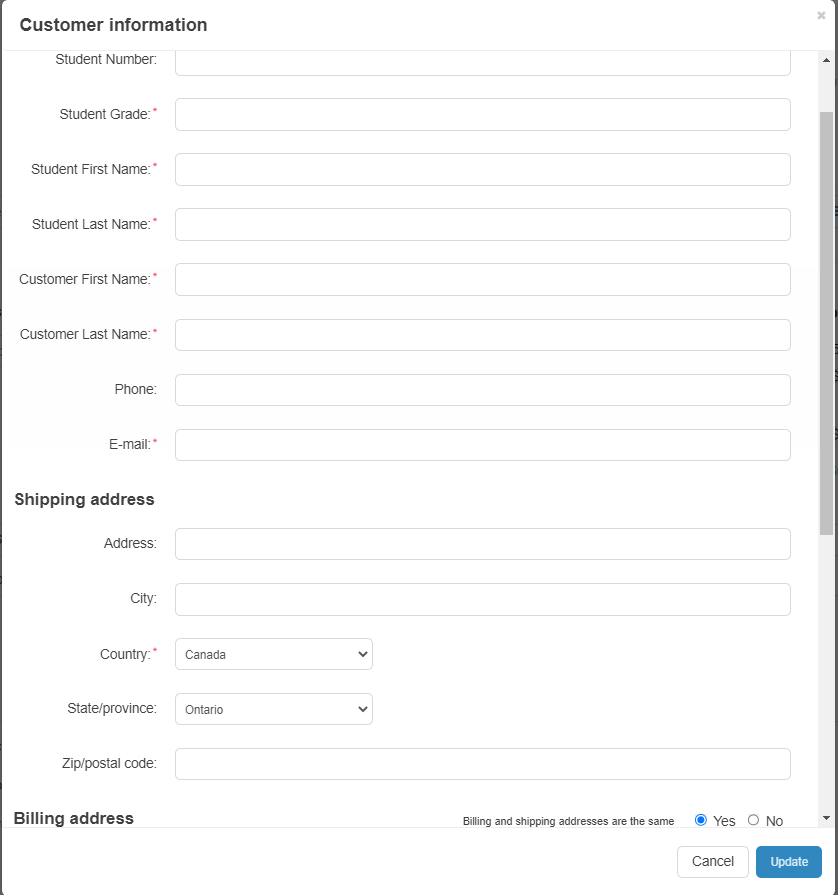
Then select Update when you are confident this information is correct.
Once you’re happy all the information looks correct, select Create in the top right corner to add the order.
A message will pop up confirming the order has been saved successfully.

Search for an order
Use the search function to search for a particular order by customer name, email, or phone number.
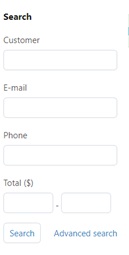
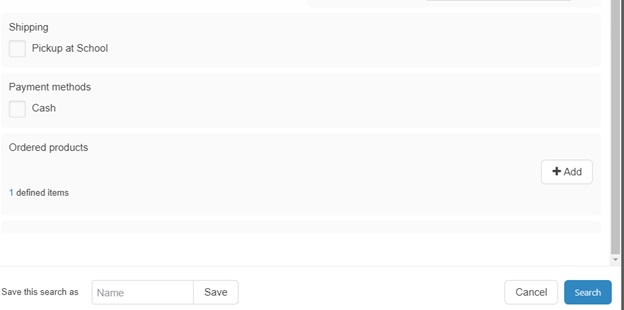
To narrow your search parameters further, you can use Advanced search. If you or the customer knows their order ID, this is where you would enter that information.
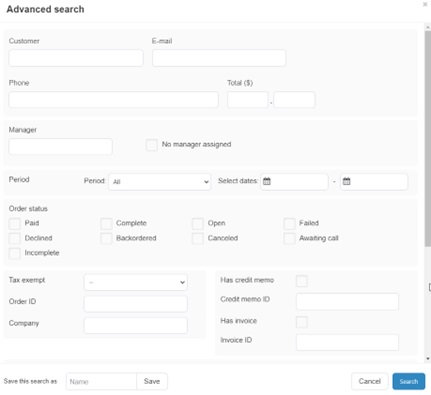
At the bottom of Advanced search, you can also lookup customer information by shipping method (current method is pickup at school), payment method and/or the product(s) that was ordered.
Export orders
Create a report by exporting orders.

Check the box to select all orders.
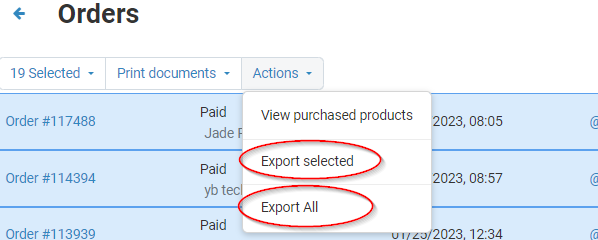
Click the Actions dropdown and there are two export choices:
a) Export selected = this will export all the orders that are currently being displayed in your orders page. Check which Standard (or custom) search view you're in - by default it's 'Paid-All'. And there's a maximum of 250 orders that can be displayed on one page.
b) Export All = this export all order transactions that have occured on the store.
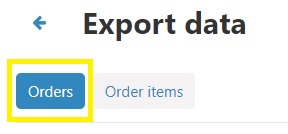
The Default Order Export Layout is called 'Everything.. However, if you want to change the export data, see below.
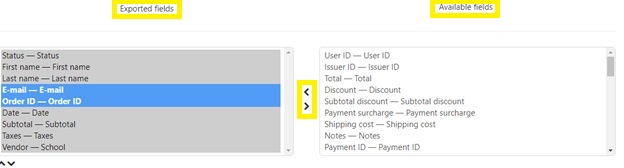
Scroll down and check the exported fields list. Add more fields to your report by selecting the appropriate field under Available fields and then click the left facing arrow to add it.
Conversely, click on any of the fields under Exported fields and the right facing arrow to remove fields you would not like featured on the report.
Before exporting your report, adjust the Export options to your preferred settings.
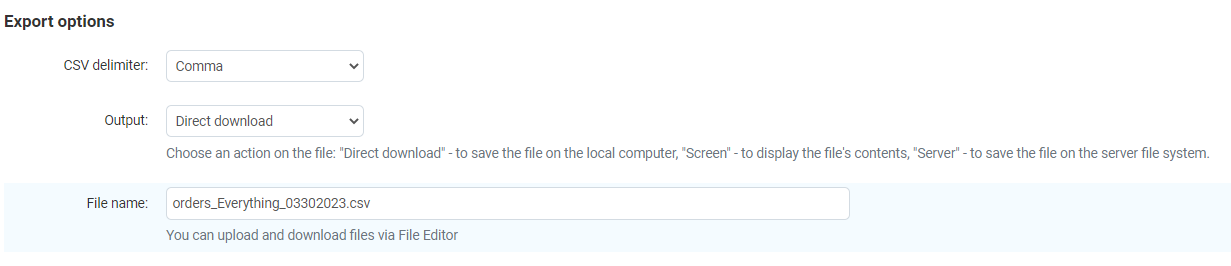
CSV delimiter: values will be separated by semi-colons, commas or tabs.
Output: Direct download will save the file on your computer and Screen will open a new tab showing your report.
File name: rename your file here.
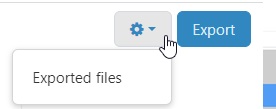
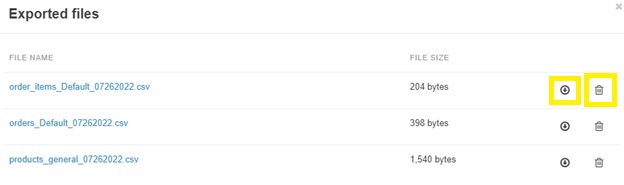
You can access reports again by clicking the gear next to the Export button on the Export data page and selecting Exported files.
Once done, click the Export button in the top right corner of the page.
A list of all the reports you’ve created will appear in this list. You can download it again or delete it from here.
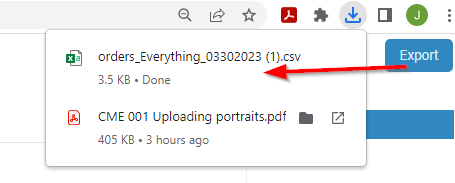
Once Export is selected, open the downloaded CSV file.
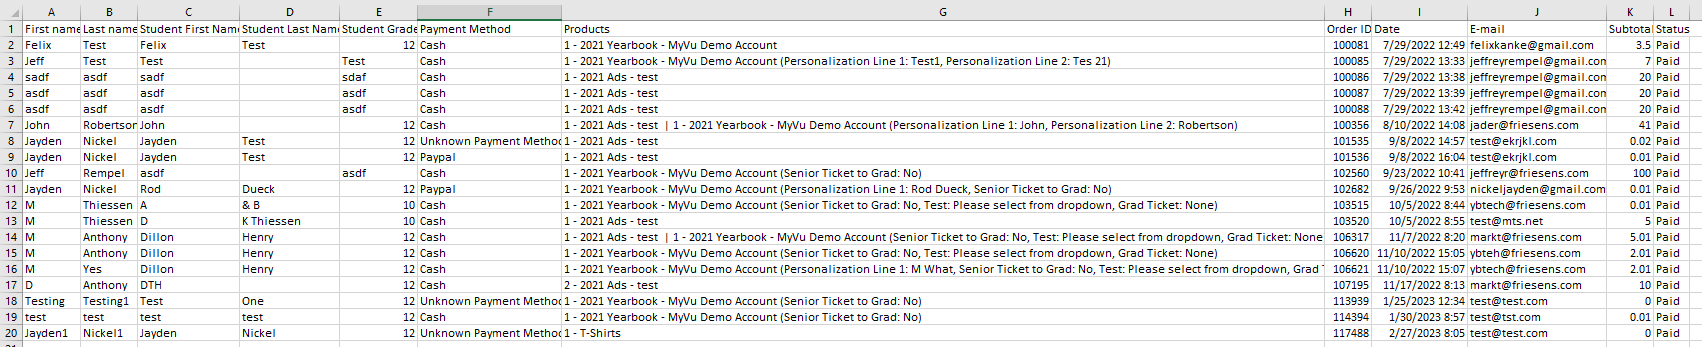
Below is what the export layout 'Everything' is displayed as.
Was this article helpful?