Understanding Bleeds
- 06 May 2021
- 2 Minutes to read
- Print
- DarkLight
- PDF
Understanding Bleeds
- Updated on 06 May 2021
- 2 Minutes to read
- Print
- DarkLight
- PDF
Article summary
Did you find this summary helpful?
Thank you for your feedback!
Understanding bleeds
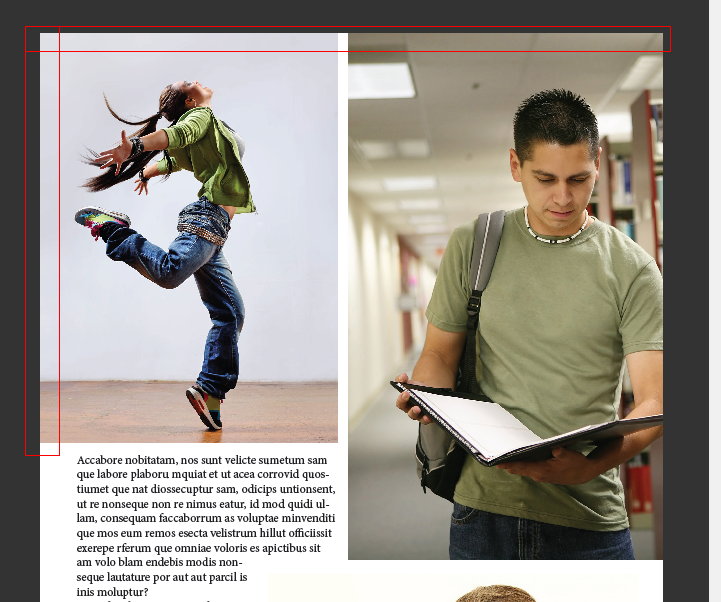
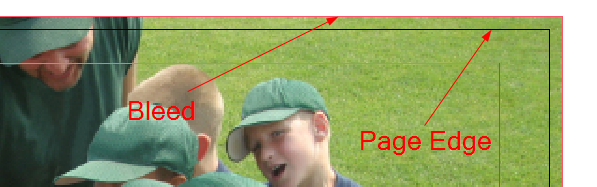
A bleed is the area outside of the page (1/8th of an inch) that is printed on the sheet but is then trimmed off later in production. This area will often contain dominant photos, candids, backgrounds or elements that will appear to "run off" the page. Below is an example where 2 images are bleeding off the edge of the page.
The reason for the bleed is to compensate for any variance that may occur in the binding process. After pages are printed on press they are folded into sections, sewn together then trimmed to exact size before the cover is applied. Due to the complexity of those processes a small amount of area is printed outside the page so that when they are trimmed there won't be any thin white lines showing on the edges of your pages.
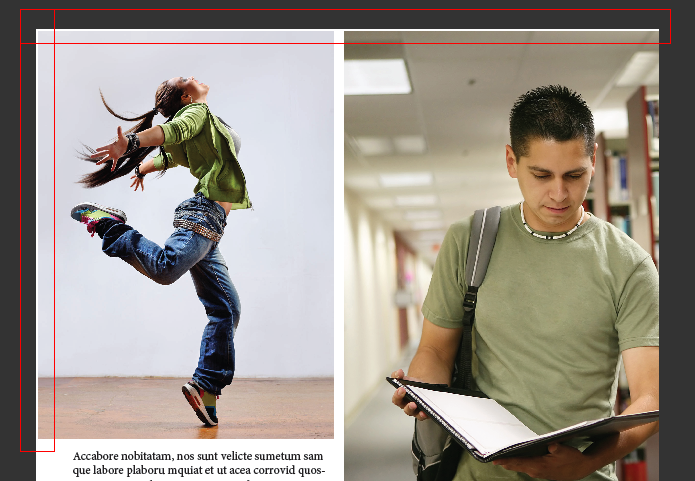
Below is an example what it might look like if the bleeds are not added correctly to a page.
NOTE: If you do not want any objects/elements to bleed off the page place them at least 0.1667 inches (1 pica) from the edge of the page. That will prevent any non-bleeding elements from getting trimmed.
Fixing Bleeds in InDesign
InDesign:
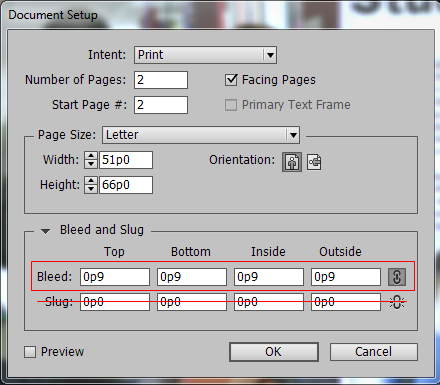
The first thing you can do to help with bleeds is to apply the bleed guides to your page in InDesign. These guides do not print but it shows you how far to place images/elements that need to run off the page (or bleed).
To turn on the bleed guides go to File>Document setup and in the bleed area add 0.125 inches (0p9) to the top, bottom, and outside.
NOTE: The inside bleed is not required as it is the gutter (or center) of your spread and will not get trimmed in final production.
Once the guides are applied you will see a red line on the outside of your page(s).
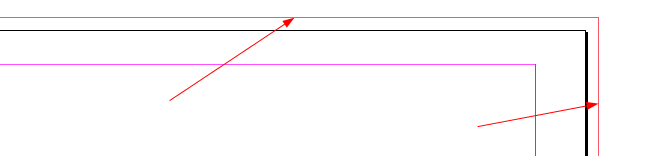
When placing your images/elements make sure to extend them up to or past that red line.
Fixing Bleeds in DesignIt (Online)
ConnectMe (Online):
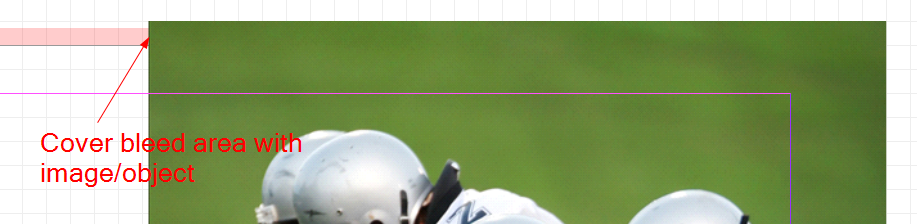
When creating your pages online in ConnectMe the system will automatically show you where the bleed area is on a spread.
When you have a spread open online in ConnectMe you will see a pink line on the outside of the spread. This line indicates the bleed area that needs to be covered in order to bleed an object or element correctly.
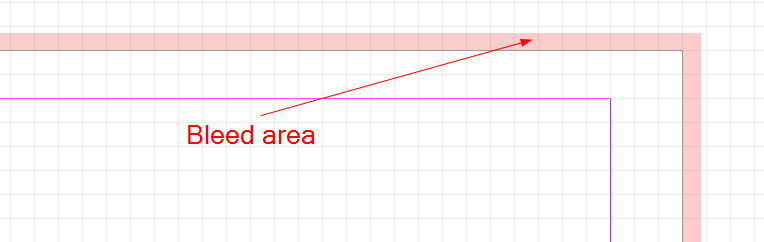
When the image or object is placed it should cover this area or go past to have it bleed properly.
Was this article helpful?